Installing privateLINE with the Wireguard
Client on iPhone:
A Step-by-Step Guide

Step 1 - Go to 
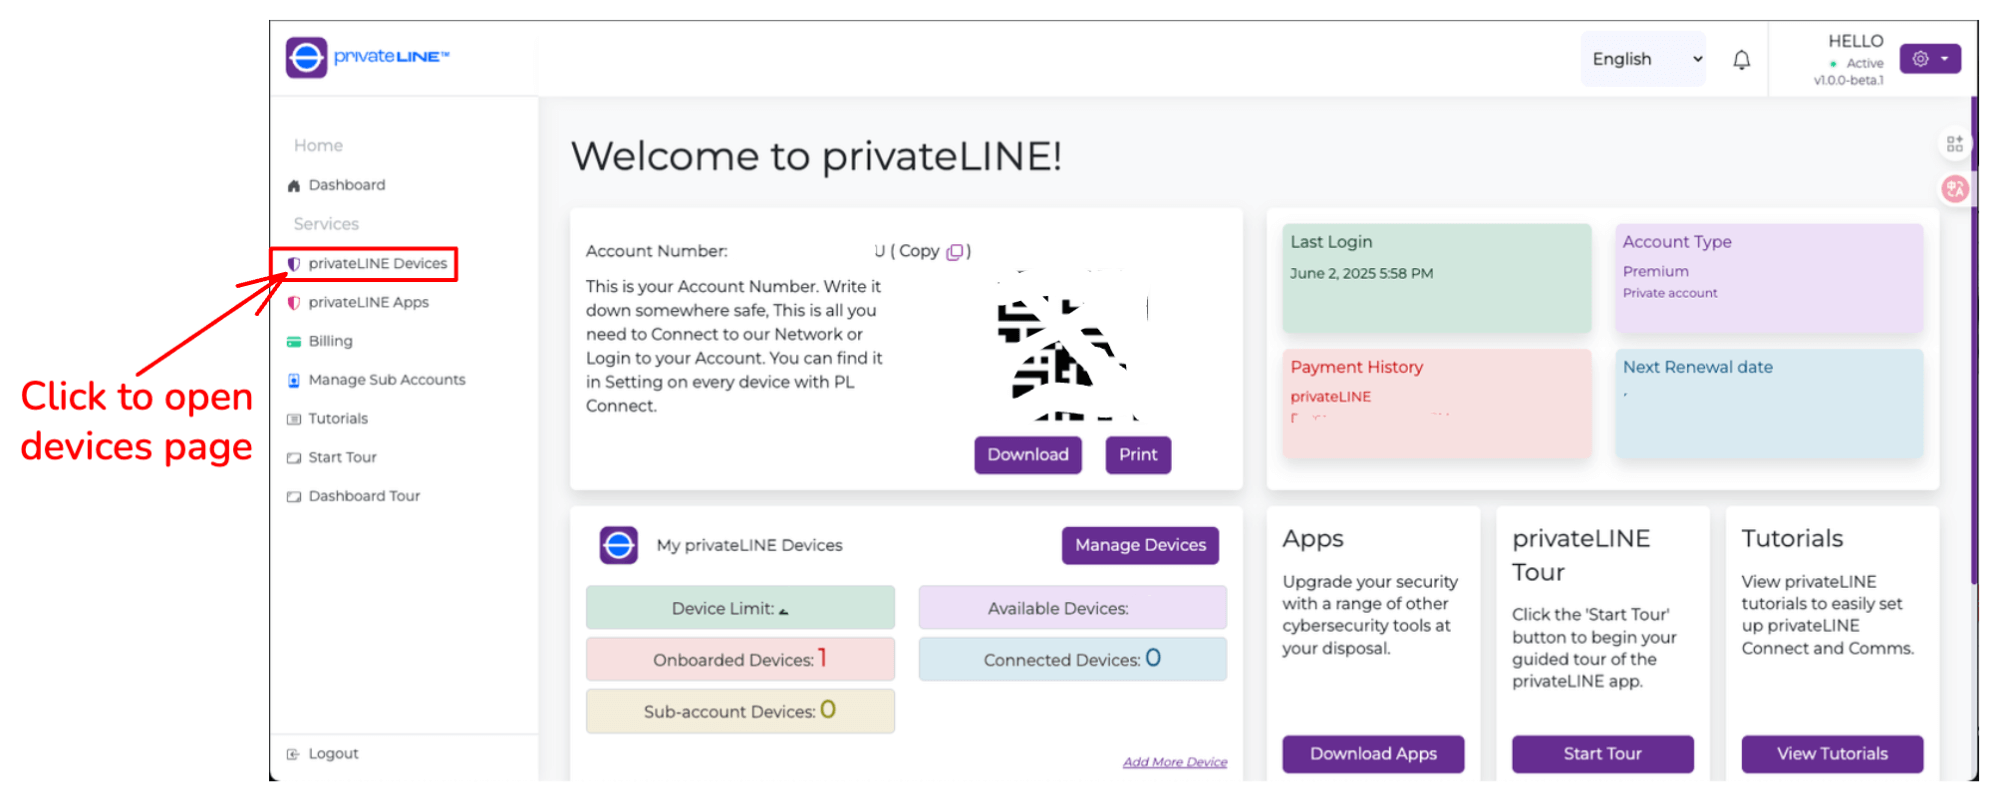
https://account.privateline.io

and click on any of these "Get Free privateLINE Alpha" buttons

config-wireguard
Step 2 -

Enter your email address, click on the I am human and then click on the submit button

config-wireguard
Step 3 -

You will then get this confirmation screen

config-wireguard
Step 4 -

You should get this validation email. Check your spam/junk folder if not received.

config-wireguard
Step 5 -

Complete Account Sign-up Form

config-wireguard
Step 6 -

Download & Open

config-wireguard
Step 7 -

Enter the account credentials created on Account Sign-up Form on step 5

config-wireguard
Step 8 -
config-wireguard
Step 9 -

If you setup a passcode for your iPhone you will need to enter it after you hit “Allow”

config-wireguard
Step 10 -

privateLINE Connect is now installed and connected. Now download privateLINE Comms from the Apple App Store

config-wireguard
Step 11 -

Download & Open

config-wireguard
Step 12 -

Create a privateLINE Comms Account

config-wireguard
Step 13 -

Enter a username and password you would like to use to create your account. Your username will be your screen name as well

config-wireguard
Step 14 -

If you would like to get notifications of new messages click “Allow”. Then click on “Personalize profile” to get to next screen.

config-wireguard
Step 15 -

You can choose a different screen name or skip and change anytime later under user settings

config-wireguard
Step 16 -

You can add a photo or skip and change anytime later under user settings

config-wireguard
Step 17 -
config-wireguard
Step 18 -
config-wireguard
Step 19 -

When you installed privateLINE Connect earlier it should of automatically defaulted to on (switch turns green and says “On”). It needs to be On for privateLINE Comms to work. Open your privateLINE Connect App and make sure it is in the “On” position.

config-wireguard